Archive for 2013
Video Converter Android Pro 1.5.5 Full Version
သင့္ Android phone က support မေပးတဲ့ video file ေတြကို တစ္ျခားဖိုင္ေဖာက္မက္ ေတြ အျဖစ္ convert လုပ္ေပးႏုိင္ပါတယ္။သင့္ဖုန္းမွာ ရွိတဲ့ video files ေတြ အားလံုးကို scan လုပ္ျပီးရွာေပးႏုိင္ပါတယ္။ေျပာင္းေပးႏိုင္တဲ့ video ဖိုင္ေဖာက္မက္ေတြ ကေတာ့ mp4,3gp,avi,vob တို ့ျဖစ္ပါတယ္။ဒါ့အျပင္ ဖိုင္ဆိုက္ေတြ ကို ေလွ်ာ့ခ်ျပီး ေျပာင္းလဲေပးႏိုင္သလို quality မက်ေစဘဲ လည္း ေျပာင္းလဲေပးႏုိင္ပါတယ္။Video file ကေန audio file အျဖစ္လည္းေျပာင္းေပးႏုိင္ပါတယ္။
Browse ကို ႏွိပ္ျပီး video ဖိုင္ေတြကို manual လိုက္ရွာႏိုင္သလို Videos ကို ႏွိပ္ျပီး Video ဖိုင္ေတြ ကို ရွာေဖြႏို္င္ပါတယ္။
သင္ေျပာင္းခ်င္တဲ့ဖိုင္ ကို tap လုပ္ျပီး select လုပ္ပါ။ဖိုင္အမ်ားအျပားကို တစ္ျပိဳင္နက္တည္းေရြးခ်ယ္ျပီးလည္းေျပာင္းႏုိင္ပါတယ္။ျပီးရင္ Convert ကို ႏွိ္ပ္ပါ။
ေနာက္တစ္ဆင့္မွာ Default ကို ႏွိ္ပ္ျပီး Reduce Size (pro) ,Keep Quality (pro),Manual,Audio Only (pro) စတာေတြကို ေရြးခ်ယ္ႏိုင္ပါတယ္။ဖိုင္ဆိုက္ကို ေလွ်ာ့ခ်ျပီး ေျပာင္းလဲခ်င္ရင္ေတာ့ Reduce Size ကို ေရြးပါ။နဂိုမူလ ဖိုင္ရဲ ့ quality အတိုင္းလို ခ်င္ရင္ေတာ့ Keep Quality ကို ေရြးပါ။Manual ကို ေရြးခ်ယ္ျပီးသင့္စိတ္ၾကိဳက္ ျပဳလုပ္ႏုိင္ပါတယ္။Audio ပဲလို ခ်င္ရင္ေတာ့ Audio Only ကို ေရြးပါ။
Container ကိုႏွိပ္ျပီး သင္ေျပာင္းခ်င္တဲ့ဖိုင္ေဖာက္မက္ကို ေရြးခ်ယ္ပါ။ျပီးရင္ Start ကို ႏွိပ္ပါ။
Convert လုပ္ျပီးရင္ Converted ကို ႏွိပ္ျပီး video file ေတြကို ၾကည့္ႏိုင္ပါျပီ။
Download Video Converter Pro 1.5.5 Full Version Dropbox (or) Mirrorcreator
Smart QrCode Generator: Generate QR codes for URLs and images in Google Chrome
Smart Phones ေတြ အသံုးျပဳမွုမ်ားလာတာနဲ ့ဖုန္းေတြ ကေန အင္တာနက္အသံုးျပဳမွုေတြ မ်ားျပားလာပါတယ္။သင့္ကြန္ျပဴတာ မွာ ၾကည့္ ေနတဲ့ ၀က္ဆိုက္တစ္ခုကို ဖုန္းကေန ၾကည့္ခ်င္တယ္ဆိုပါစို ့။ဖုန္း မွာ အဲဒီဆိုက္ရဲ ့လိပ္စာ ကို ရိုက္ထည့္ရမွာပါ။ဖုန္း ဟာ အရြယ္အစားေသးငယ္တဲ့အတြက္ ၀က္ဆိုက္လိပ္စာေတြ ရိုက္ရတာ အလုပ္ရွုပ္ပါတယ္။အဲဒီ အခက္အခဲကို Smart QrCode Generator ဆို တဲ့ chrome extension ကေျဖရွင္းေပးႏုိင္ပါတယ္။အဲဒီ extension က သင့္ကြန္ျပဴတာက ၀က္ဆိုက္လိပ္စာ၊ ပံု စတာေတြကို သင့္ဖုန္းမွာ ၀က္ဆိုက္လိပ္စာေတြ ရိုက္ထည့္စရာမလို ဘဲ အလြယ္တကူ ၾကည္ ့ႏိုင္ေအာင္ QrCode ေတြ ျပဳလုပ္ေပးႏိုင္ပါတယ္။အဲဒီ QrCode ကို သင့္ဖုန္း က QrCode Scanner ေတြ နဲ ့scan လုပ္လိုက္တာနဲ ့ ၀က္ဆိုက္ေတြ ကို သင့္ဖုန္းကေန ၾကည့္ရွုႏိုင္မွာပါ။သင့္ဖုန္းမွာ ေတာ့ Barcode Scanner လို application ေတြ ရွိဖို ့လို ပါတယ္။
Smart QrCode Generator ကို chrome browser မွာ အင္စေတာလုပ္ျပီးရင္ သင့္ဖုန္း ကေန ၾကည့္ခ်င္တဲ့ဆိုက္ကို သြားပါ။Address bar က Smart QrCode Generator ပံုကို ႏွိပ္ပါ။ဒါဆိုရင္ QrCode ေပၚလာျပီးသင့္ဖုန္းကေန QrCode Scanner နဲ ့ scan လုပ္လိုက္ရင္ အဲဒီဆိုက္ကို သင့္ဖုန္းကေန ၾကည့္ရွုုႏိုင္ပါျပီ။၀က္ဆိုက္လိပ္စာေတြ သင့္ဖုန္း မွာ ရိုက္ထည့္စရာမလို တဲ့အတြက္ အဆင္ေျပပါတယ္။
ပံုေပၚမွာ right click ႏွိပ္ျပီး Generate Smart QrCode ကို ႏွိပ္ရင္ အဲဒီပံုအတြက္ QrCode ကို ရရွိႏုိင္ပါတယ္။
Check out Smart QrCode Generator @ Chrom Web Store
TV WatchList: Use Google Chrome To Find Out Runtimes For TV Shows
သင္ၾကည့္ေနတဲ့ TV Show ေတြ ဘယ္ေန ့မွာ အပိုင္းသစ္ထြက္မလဲ ဆိုတာသိခ်င္ရင္ Imdb တို ့လို ၀က္ဆိုက္ေတြကို ၀င္ၾကည့္ၾကရပါတယ္။Chrome browser သံုးသူေတြ အတြက္ေတာ့ TV WatchList ဆို တဲ့ browser extension ကို အင္စေတာလုပ္ထားရင္ လြယ္လြယ္ကူကူပဲ သင့္ favourite shows ေတြ ဘယ္ေန ့မွာ episode အသစ္ထြက္မလဲဆိုတာသိႏိုင္ပါတယ္။အဲဒီအတြက္ တစ္ျခား ၀က္ဆိုက္ေတြ သြားၾကည့္စရာမလို တဲ့အတြက္ အခ်ိန္ကုန္ သက္သာျပီးလြယ္ကူအဆင္ေျပပါတယ္။
TV WatchList ကို chrome မွာ အင္စေတာလုပ္ျပီးရင္ အိုင္ကြန္ကို ႏွိပ္ျပီးသင္ၾကည့္ေနတဲ့ TV Show နာမည္ကို ရိုက္ရွာေပးပါ။ရွာေတြ ့ရင္ TV Show နာမည္ကို ႏွိပ္ရင္ Add to WatchList စာရင္းထဲေရာက္သြားပါျပီ။
ဒါဆိုရင္ အဲဒီ TV Show ဘယ္ေန ့မွာ episode အသစ္ထြက္ မလဲဆိုတာ ေအာက္ကပံုမွာလို ေတြ ့ျမင္ႏိုင္မွာပါ။
Soft Organizer allows you COMPLETELY uninstall unnecessary applications from your system. [Giveaway]
A common problem we often face, when uninstalling unnecessary software, is various traces left in the system: unneeded files or folders on a disk, registry entries and so on. This can happen even if an application was removed correctly with its own uninstaller. The Soft Organizer program is intended to solve this problem: It allows you COMPLETELY uninstall unnecessary applications from your system.
Soft Organizer monitors all changes made to the system during the setup process of a certain application. You can easily learn what file or registry entries were modified during the installation. Using these data, Soft Organizer completely removes an application when you order it to.
Download Full Version For Free @ http://www.giveawayoftheday.com/
[Limited Time]
Full Version ကုိ http://www.giveawayoftheday.com/ မွာ အခမဲ့ေဒါင္းလုပ္လုပ္ႏုိင္ပါသည္။
[အခ်ိန္အကန္ ့အသတ္အတြင္းသာ]
Acronis True Image Home 2013 16 Build 6514 Full Version
သင့္ဖိုင္ေတြ ဖိုဒါေတြ အျပင္ system တစ္ခုလံုးကို backup and restore လုပ္ေပးႏိုင္ပါတယ္။Incremental and Differential Backup လည္းလုပ္ေပးႏုိင္ပါတယ္။File ေတြကို version ေတြ အလိုက္သိမ္းေပးႏုိင္ျပီး သင္ edit မလုပ္ခင္က ဖိုင္နဲ ့ edit လုပ္ျပီးတဲ့ဖိုင္ႏွစ္မ်ိဳးစလံုးကို သိမ္းေပးႏိုင္တဲ့အတြက္ သင္ၾကိဳက္ႏွစ္သက္ရာဖိုင္ကို ျပန္ရယူႏုိင္ပါတယ္။မွားဖ်က္မိတဲ့ဖိုင္ေတြကိုလည္းျပန္ျပီး ရယူႏုိင္ပါတယ္။Schedule လုပ္ျပီး backup လုပ္ေပးႏုိင္ပါတယ္။Nonstop Backup လုပ္ေပးႏုိင္တဲ့ အတြက္ သင့္ဖိုင္ေတြ ဖိုဒါေတြ အျပင္ system တစ္ခုလံုးကို အခ်ိန္အပိုင္းအျခားအလိုက္ျပန္ျပီး recover လုပ္ႏုိင္ပါတယ္။အႏၱရာယ္ ရွိႏိုင္တဲ့ ေဆာ့၀ဲေတြ မသြင္းခင္ ၀က္ဆိုက္ေတြ မၾကည့္ခင္မွာ Try & Decide ျဖင့္ သင့္ကြန္ျပဴတာကို ကာကြယ္ေပးႏုိင္ပါတယ္။Rescue media builder ပါရွိျပီး startup recovery manager လည္းပါရွိတ့ဲအတြက္သင့္ကြန္ျပဴတာ boot မတက္ေတာ့ရင္ system တစ္ခုလံုး ဒါမွမဟုတ္ files ေတြ ကို ျပန္ျပီး recover လုပ္ႏိုင္ပါတယ္။Secure Zone ျဖင့္ သင့္ကြန္ျပဴတာမွာ ပဲ disk backup လုပ္ေပးႏုိင္ျပီး သင့္ system အလုပ္မလုပ္ေတာ့တဲ့ အခ်ိန္မွာ Secure Zone ကေန recover လုပ္ႏိုင္ပါတယ္။System Cleanup,Drive Cleanser,File Shredder စတဲ့ Security and Privacy Tools ေတြ ပါရွိပါတယ္။Partition ခြဲႏုိင္တဲ့ disk management tool လည္းပါရွိပါတယ္။Image ဖိုင္ေတြ ကို သာမန္ hard disk အေနနဲ ့mount လုပ္ေပးႏိုင္ပါတယ္။Backup conversion ျပဳလုပ္ႏုိင္ျပီး Windows Backup ကေန Acronis Backup ကို ေျပာင္းႏိုင္သလို အျပန္အလွန္အားျဖင့္ Acronis Backup ကေန Windows Backup ကို ကူးေျပာင္းႏုိင္ပါတယ္။Windows 8 all Editions, Windows 7 all Editions SP1 ,Windows Vista all Editions SP2 ,Windows XP Home Edition SP3 ,Windows XP Professional(X32 SP3/X64 SP2) ,Windows Home Server 2011 စတဲ့ os ေတြ မွာ သံုးႏုိင္ပါတယ္။True Image 2013 Plus Pack ကို ပါအင္စေတာလုပ္ရင္ေတာ့ Migrate ဆိုတဲ့ feature ကုိပါအသံုးျပဳႏိုင္ျပီး သင့္ operating system တစ္ခု လံုး၊ programs ,files ,setting ေတြ အားလံုးကို တစ္ျခား computer , hardware ေတြကို ကူးေျပာင္းေပးႏုိင္မွာပါ။
True Image 2013 by Acronis
It's a whole new vision for backup. It’s the latest sync technologies. It’s cloud storage. It's a new True Image supporting new devices. And it's easy to try now — whether you're installing it for the first time, or upgrading from a previous version.
True Image 2013 by Acronis protects your photos, documents, music, mail, programs, contacts, calendars, and more. It stores your content in a secure online location and syncs it with your devices. True Image 2013 is safe, reliable, easy.
Breakthrough sync
The newest sync technologies are here. We’ve made synchronization fast, secure, and breathtakingly simple. The files you choose are pushed to all your devices – automatically, effortlessly, and seamlessly.
Mobile file access
Your files are available from all your favorite devices, from smartphones to tablets and PCs. So your files are always available—anywhere, anytime. And mobile apps are available for free.
Disk imaging
Restore everything – not just the files, but the exact configuration of your computer including your operating system, settings, and applications.
Nonstop backup
True Image 2013 records ongoing changes as you work, so you can revisit any file, folder or your entire system as it was at a specific point in time.
Windows 8
Hand in hand with the latest developments, True Image 2013 is compatible with Windows 8. And it still supports all Windows operating systems back to XP.
Try&Decide
Avoid disasters before they happen. Try out new software and browse any websites, even if they are potentially dangerous. Try&Decide technology allows you to take a test drive and decide if you want to keep any changes to your computer.
What’s new
Perfect sync
We’ve brought sync to near perfection. We took an already amazing technology and made it even better. Share unlimited amounts of information with your friends or between your own devices, and set any folders you want to synchronize – on your computer, phone, tablet, network, USB key or an external drive. True Image 2013 is so much faster and easier to use than ever before.
Windows 8 support
True Image 2013 is compatible with Windows 8 so it ready to go on all the latest PCs. Of course it also supports earlier Windows versions down to Windows XP. Stay current with technological developments! Or don’t – your True Image software will work perfectly on virtually any PC.
Download
Download with TusFiles accelerator ဆိုတဲ့ check box က အမွန္ျခစ္ကို ျဖဳတ္ျပီးေဒါင္းလုပ္လုပ္ပါ။
Acronis True Image Home 2013 + Plus Pack (Torrent)
Plus Pack ပါလို ခ်င္တဲ့သူေတြ အတြက္ အေပၚကလင့္ကို သြားပါ။ျပီးရင္ ကြ်န္ေတာ္ေရးထားတဲ့ Torrent ဖိုင္ေတြကို ေဒါင္းလုပ္လုပ္နည္း ကို ဖတ္ျပီးေဒါင္းလုပ္လုပ္ပါ။
How To Install
1. Internet connection ကို ပိိတ္ပါ။
2."ATIH2013_trial_en-US.exe" ဖိုင္ကို run ျပီး အင္စေတာလုပ္ပါ။
3.Install wizard မွာ serial ေတာင္းရင္ ေအာက္က serial ကို ျဖည့္ေပးပါ။
7UGXVXH6-PSKV8AXP-K4WZ7SWR-KLXWUSSV-AW62CSPC-EVERRZSR-C5XC3SU4-C8R8UVJQ
4.Install wizard ေနာက္ဆံုးေရာက္ရင္ application ကို ပိတ္ပါ။မဖြင့္ပါနဲ ့။
5."libcrypto10.dll" ဆိုတဲ့ Crack ဖိုင္ကို ေအာက္က ဖိုဒါေအာက္ကို ကူးပါ။Copy and replace လုပ္ပါ။
C:\Program Files (x86)\Common Files\Acronis\Home\
replace လုပ္လို ့မရရင္ task manager ကို ဖြင့္ျပီး acronis နဲ ့ပတ္သတ္တဲ့ process , service ေတြကို အရင္ ပိတ္ပါ။
6.System ကို restart လုပ္ပါ။
7.Acronis ကို ဖြင့္ျပီး "?" button ကို ႏွိပ္ပါ။Activate ကို ႏွိပ္ျပီး "Activate from another computer" ကို ႏွိပ္ပါ။ျပီးရင္ေအာက္က နံပါတ္ ျဖည့္ေပးပါ။
95432465432
8.Acronis ကို ပိ္တ္ျပီး "license_activator.exe" ကို ေအာက္က ဖိုဒါမွာ ရွာျပီးဖ်က္ပါ။
C:\Program Files (x86)\Acronis\TrueImageHome
9,"ATIH2013PP_en-US.exe" ကို run ျပီး plus pack ကို အင္စေတာလုပ္ပါ။Serial ေတာင္းရင္ေအာက္က serial ျဖည့္ေပးပါ။
BA6CZ7WS-SN6Z7Z3L-NHG2J4CN-BDJDPTKB-DJW2R6FL-K6WNRVCL-RVXWS25C-2FD4MY47
Easy Digital Photo Recovery can recover photos from any media, including flash cards and hard drives. [Giveaway]
Easy Digital Photo Recovery is a photo recovery program that works with deleted photos, restoring them to their original state. This software solution supports all types of cameras and most graphic formats, like JPG, BMP, RAW, OCR and other. All storage media types can be recovered: flash cards, SD cards, hard drives etc.
The core algorithms allow recovering the maximum number of photos and the recovery process is quick and painless, requiring almost no effort from a user. There’s a preview that shows the recoverable photos in advance. This program successfully combines sheer simplicity and great power and does its job of recovering deleted photos flawlessly.
Purchase a personal license (including updates and technical support) at 70% discount
Download Full Version For Free @ http://www.giveawayoftheday.com/
[Limited Time]
Full Version ကုိ http://www.giveawayoftheday.com/ မွာ အခမဲ့ေဒါင္းလုပ္လုပ္ႏုိင္ပါသည္။
[အခ်ိန္အကန္ ့အသတ္အတြင္းသာ]
Kestrel GX enables you to import photos from your camera, edit them and catalog them with incredible ease. [Giveaway]
Kestrel GX is a fast and easy to use digital photo manager and photo editor software. With Kestrel GX managing and editing photos is a breeze, as it enables you to import photos from your camera, edit them and catalog them with incredible ease. Kestrel GX lets you attach searchable keywords and description to each photo file so it can be searched easily.
Kestrel GX can also catalog photos that are on external media such as: DVD, flash drive or external hard disk and you can search through the photo collection even when your external media is not connected. Kestrel GX’s powerful cataloging and search functions are supplemented with a range of supporting functionalities. You will be able to: convert your images to several other formats, create photo books, build your own printing and watermark templates, view slideshows, perform several batch operations like resize, rotate, flip, rename and much more.
And if you are new to photo editing, Kestrel GX’s built-in photo editor will help you edit your photos like a pro in just 10 simple steps! You can also enhance your images with a wide range of special effects like filters, frames, vignettes, polaroid effect, tilt-shift effect and more.
Please note that Cerieus, the developer of Kestrel GX, uses the OpenCandy network to provide recommendations of other third party software during installation. Make sure to opt-out if you don’t need a software being offered.
Note that 5 best improvement ideas will be rewarded with tech support and lifetime license for Kestrel GX. Use Idea Informer widget to submit your feedback and do not forget to fill in your name and e-mail – otherwise the Developer will not be able to contact you in case you are the one to win!
Download Full Version For Free @ http://www.giveawayoftheday.com/
[Limited Time]
Full Version ကုိ http://www.giveawayoftheday.com/ မွာ အခမဲ့ေဒါင္းလုပ္လုပ္ႏုိင္ပါသည္။
[အခ်ိန္အကန္ ့အသတ္အတြင္းသာ]
GOM Remote : Control GOM Player From IPhone & Android
GOM Player ဟာ free media player တစ္ခု ျဖစ္ျပီး အေကာင္းဆံုး media player ေတြ ထဲက တစ္ခု ပါ။GOM Lab ကမၾကာေသးမီက သင့္ ကြန္ျပဴတာ က GOM Player ကို သင့္ IPhone , Android Phone ေတြ ကေန control လုပ္ေပးႏိုင္မယ့္ GOM Remote ဆို တဲ့ applications ေတြကို အခမဲ့ ျဖန္ ့ေ၀ခဲ့ပါတယ္။ဒီလို ထိန္းခ်ဳပ္ႏုိင္ဖို ့အတြက္ သင့္ကြန္ျပဴတာနဲ ့ IPhone , Android Phone ေတြ ဟာ တူညီတဲ့ network တစ္ခု တည္းမွာ ရွိရပါမယ္။သင့္ကြန္ျပဴတာကေန wifi လႊင့္ဖို ့အတြက္ Connectify Hotspot Pro ကို သံုးပါ။
GOM Remote application ကို သံုးျပီး ထိန္း ခ်ဳပ္ခိုင္းေစႏုိင္မယ့္ အရာေတြ ကေတာ့
Run and close GOM Player
Open new files
Take snapshot of running video
Mute the audio
Quickly play/pause running video
Change volume
Minimize screen
Switch to full screen
Change aspect ratio
Turn on/off subtitles
Open and configure subtitle
Control GOM Audio
Control PowerPoint presentations
ပထမဆံုး သင့္ကြန္ျပဴမွာ GOM Tray ဆို တဲ့ application ကို ေဒါင္းလုပ္လုပ္ျပီးအင္စေတာလုပ္ရပါမယ္။အင္စေတာလုပ္ျပီးရင္ သင့္ကြန္ျပဴတာနဲ ့သင့္ ရဲ ့ IPhone,Android Phone နဲ ့ခ်ိန္ဆက္ဖို ့ Pairing Key ကို ရရွိပါမယ္။အဲဒီ ကီး ကို သင္မွတ္ထားစရာမလို ပါဘူး။System tray က GOM tray အိုင္ကြန္ကို mouse cursor ေထာက္ၾကည့္ရင္ IP နဲ ့ pairing key ကို ေတြ ့ျမင္ႏုိင္ပါတယ္။
GOM Remote ကို သင့္ IPhone , Android Phone မွာ အင္စေတာလုပ္ဖို ့ သက္ဆိုင္ရာ Application Store ေတြ ကေန ေဒါင္းလုပ္လုပ္ျပီး အင္စေတာလုပ္ပါ။New Connection ကိုႏွိပ္ပါ။
ေနာက္အဆင့္မွာ သင့္ကြန္ျပဴတာရဲ ့ IP ကို ထည္ ့ျပီး connect လုပ္ႏိုင္သလို Pairing Key ကို ထည္ ့ျပီးလည္း connect လုပ္ႏိုင္ပါတယ္။System Tray က GOM Tray အိုင္ကြန္ကို mouse cursor ေထာက္ၾကည့္ရင္ IP , Pairing Key ေတြ ကို ေတြ ့ျမင္ႏိုင္ပါတယ္။
GOM Player နဲ ့ GOM Remote ခ်ိတ္ဆက္မိသြားရင္ေတာ့ GOM Player ကို သင့္ IPhone , Android Phone ေတြကေန သင္ထိန္းခ်ဳပ္ႏုိင္ပါျပီ။GOM Remote ကို အသံုးျပဳတိုင္း IP , Pairing Key ေတြကို သင္ထည့္ေပးစရာမလို ဘဲ Recent Connections ကေန အသံုးျပဳႏုိင္ပါတယ္။
GOM Remote က GOM Media Player သာမက GOM Audio Player , PowerPoint Presentation စတာေတြကို ပါ ထိန္းခ်ဳပ္ႏုိင္ပါေသးတယ္။
PDF Rotator rotates PDF files 90 or 180 degrees clockwise and counterclockwise simply. [Giveaway]
PDF Rotator is a Windows application permanently rotates PDF files 90 or 180 degrees clockwise and counterclockwise simply. With PDF Rotator, you can rotate PDF document pages properly, and the program also allows users to rotate pages in specified page range.
Besides, PDF Rotator is able to rotate restricted PDF files, and it supports batch mode so that users are able to rotate PDF documents in bulk.
Download Full Version For Free @ http://www.giveawayoftheday.com/
[Limited Time]
Full Version ကုိ http://www.giveawayoftheday.com/ မွာ အခမဲ့ေဒါင္းလုပ္လုပ္ႏုိင္ပါသည္။
[အခ်ိန္အကန္ ့အသတ္အတြင္းသာ]
Photo Slideshow Maker Professional[Giveaway]
With Photo Slideshow Maker, you can create amazing photo flash slideshows in SWF format for watching on computer, burn the auto-run flash photo album to gift CD/DVD, build a web gallery with amazing flash slideshows with dynamic SWF + HTML + XML files, or upload the slideshows to our free web album Go2Album, and then embed the slideshows to MySpace, Blogger, Friendster and many other social websites.
Photo Slideshow Maker helps you create personal website slideshow, photo album, product showcase, web banner, business presentation, flash intro and achieve more other flash slideshow work.
Free Downlod @ http://www.giveawayoftheday.com/
How To Add My Computer To Windows 8 Start Screen And Desktop
Windows 8 ကို clean install လုပ္ရင္ My Computer icon ကို desktop မွာေရာ start screen မွာပါ မေတြ ့ရွိႏိုင္ပါဘူး။Windows 7 နဲ ့တစ္ျခား၀င္းဒိုးေတြကေန upgrade လုပ္မွသာ My Computer icon ကို desktop မွာေတြ ့ျမင္ႏုိင္ပါတယ္။အဲဒီအတြက္ My Computer icon ကို Windows 8 ရဲ ့ desktop , start screen မွာ ေတြ ့ျမင္အသံုးျပဳႏုိင္ဖို ့နည္းကို မွ်ေ၀ပါတယ္။Windows 7 အသံုးျပဳသူေတြအတြက္ start menu က My Computer ေပၚကို right click ႏွိပ္ျပီး show on desktop ကိုႏွိပ္ျပီးအလြယ္တကူ desktop မွာ My Computer icon ကို ထားရွိႏိုင္ပါတယ္။Windows 8 မွာ start menu မပါရွိေတာ့တဲ့ အတြက္ ဒီလို လုပ္လို ့မရေတာ့ပါဘူး။Windows 8 မွာ start menu အသံုးျပဳခ်င္ရင္ေတာ့ ဒီေဆာင္းပါး ကို ဖတ္ပါ။Start menu အစားထိုး ေပးႏုိင္တဲ့ program ေတြ ကို မသံုးခ်င္ရင္ေတာ့ ေအာက္ကနည္းေတြကို အသံုးျပဳပါ။
Show My Computer On Desktop
Desktop ေပၚမွာ right click ႏွိပ္ျပီး Personalize ကိုႏွိပ္ပါ။
ေနာက္ေပၚလာတဲ့ ၀င္းဒိုးမွာ Change desktop icons ကိုႏွိပ္ပါ။
ေနာက္ေပၚလာတဲ့ ၀င္းဒိုးမွာ Computer ဆိုတဲ့ check box မွာ အမွန္ျခစ္ေပးျပီး Apply ႏွိပ္ျပီး OK ႏွိပ္ပါ။ဒါဆိုရင္ Windows 8 desktop မွာ My Computer icon ကို သင္ေတြ ့ျမင္ႏိုင္ပါျပီ။
Add My Computer To Start Screen
Win + E ကို ႏွိပ္ျပီး file explorer ကိုဖြင့္ပါ။Computer ေပၚကို right click ႏွိပ္ျပီး Pin to Start ကို ႏွိပ္ပါ။ဒါဆိုရင္ My Computer ကို start screen မွာ ေတြ ့ျမင္ႏုိင္ပါျပီ။My Computer icon ကို start screen မွာ သင္ၾကိဳက္တဲ့ ေနရာ ခ်ထားဖို ့အတြက္ Customize Windows 8 Start Screen ဆိုတဲ့ ေဆာင္းပါးကို ဖတ္ပါ။
Advanced SystemCare Pro 6[Giveaway]
Please note that GOTD version includes 6-month subscription. You can save 80% when you purchase Advanced SystemCare 6 Family Pack (US$19.99, 3PCs supported) today!
by Giveaway of the Day team via Giveaway of the Day
Android Multipurpose Toolkit Version 1.0
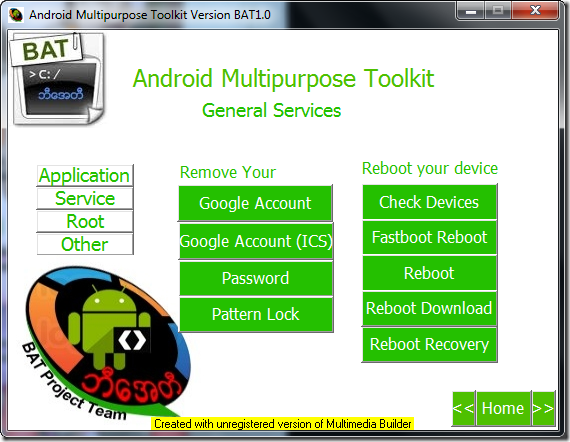
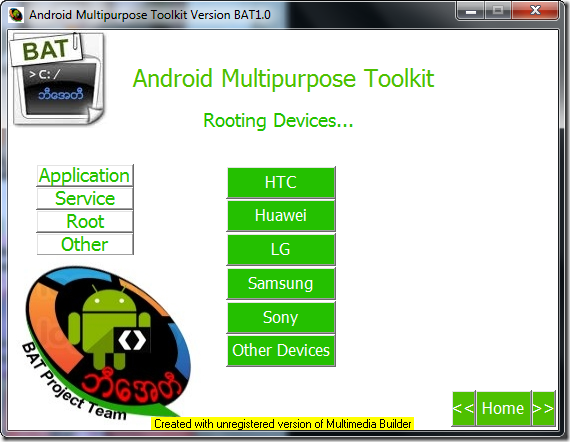
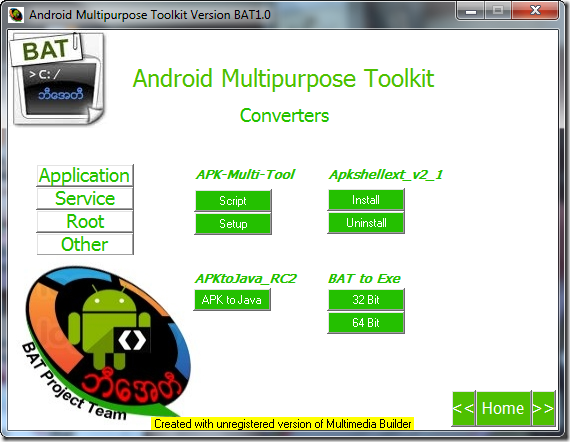
BAT Group မွ ဆရာမ ေဒၚထားထားလြင္ ရဲ ့ android multipurpose toolkit version 1.0 ကို myanmarmobileapp.com ကေတြ ့လို ့ျပန္လည္မွ်ေ၀လိုက္ပါတယ္။ဖုန္း အမ်ိဳးအစား ေတာ္ေတာ္မ်ားမ်ားကိုလြယ္ကူစြာပဲ root/unroot လုပ္ေပးႏိုင္ပါတယ္။ျမန္မာစာေဖာင့္ထည့္ေပးႏိုင္ျပီး Google Applications ေတြ မပါတဲ့ဖုန္း ေတြမွာ Google Applications ေတြ ထည့္ေပးႏိုင္ပါတယ္။Pattern Lock က်ေနတဲ့ဖုန္းေတြကို ေလာ့ျဖည္ေပးႏိုင္ပါတယ္။ဖိုင္ဆိုက္ၾကီးျပီး ေလး ဖိုင္ခြဲထားပါတယ္။ေလးဖိုင္ကို ေပါင္းျပီးအသံုးျပဳနည္းကို လည္း ေအာက္မွာ ေဒါင္းလုပ္လင့္ေပးထားပါတယ္။
အပိုင္း(၁)
http://www.mediafire.com/?jw5vb84fd0c2gst
အပိုင္း(၂)
အပိုင္း(၃)
အပိုင္း(၄)
အေပၚကဖုိင္ေလးဖိုင္ကို ေပါင္းစပ္အသံုးျပဳနည္းကို ေအာက္ကလင့္ ကေနေဒါင္းပါ။
AMT Beta Version Online ကိုေဒါင္းျပီးတဲ့ေနာက္မွာ ျပန္စစ္ပါ ေအာက္ပါအတိုင္းအစံုပါလားဆိုတာ…
adb
AMT Beta Version.rar
AndroidAIOFlasher
APKfiles
apk_installer_f.bat
apk_installer_rf.bat
apk_installer_rs.bat
apk_installer_s.bat
autorun.inf
BaganKeyboard.exe
checkdevices.exe
converter
Copy2SD.exe
CustomROM.exe
CustomROM.txt
CWM-Install Xperia
cwm.bat
CWM.exe
CWMImg
CWMRecovery.exe
CWMSuperSu.zip
cwmXinstall.exe
cwmXmodels.txt
DooMLoRD.txt
driver
EasyUnlockTool
EasyUnlockTool.exe
ERoot-1.0.14.exe
files
fire.lib
FontWithoutRoot.exe
gappginger.exe
gb
GBRoot.exe
GinerBreak.exe
GN OneClickRoot
googleaccount.exe
HTC Quick Root.exe
htcroot.bat
HTC_CWM_Img
htc_huawei.exe
HuaweiEmotionUI.exe
Huawei_CWM_Img
ICS Root.exe
icsmini
ics_root_unlock.exe
iplasma.lib
minigb
miniICS1.exe
MMFont
mmfont23x.exe
mmfontsony40x.exe
Names of Folder and Files.bat
password.exe
pattern.exe
plasma.lib
Player
rmgaccICS.exe
root
root.rar
RootHTC.exe
RootHuawei.exe
RootLG.exe
RootSamsung.exe
RootSony.exe
roottools
roottools.rar
runme domlord4.bat
RunMe.sh
samsungroot.exe
samsung_root.exe
samsung_unroot.exe
SonyRoot.exe
Sound and Img
Start Application.exe
status.txt
SuperOneClick.txt
temp.drw
Tools
UnlockCodeSony.exe
UnlockHTC.bat
UnlockHTC.exe
UnlockHuawei.exe
unlockHuaweibat.exe
unlockSonybat.exe
Unroot Tablet S from Fi01_IS01.exe
unroot.bat
unrootsamsung4.exe
update.zip
Used Files.txt
z4root.exe
Z4Root.txt
checkdevices.exe ကိုဖ်က္ျပီး ေအာက္က လင့္က checkdevices.exe နဲ ့အစားထိုးေပးပါ။
APK ကို install လုပ္ရန္ APKfiles ဆိုတဲ့ဖိုဒါေပးထားပါတယ္။ အဲဒီထဲမွာကိုယ္ install လုပ္ခ်င္တဲ့ APK files မ်ားကိုထည့္ထားရံုပါဘဲ။ ျပီးရင္ ၾကိဳက္ရာ Button ကိုႏွိပ္ရံုပါဘဲ။ ကိုယ္စိတ္ၾကိဳက္ေရြးႏိုင္ပါတယ္။
download လုပ္ျပီး ေပါင္းထားတဲ႔ AMT Beta Version Online ဆုိတဲ့ folder ထဲက start application ဆုိတာေလးကို ႏွိပ္ျပီး စတင္ အသံုးျပဳႏုိင္ပါျပီ။
Microsoft Office Professional Plus 2013 + Activator
Microsoft Office Professional Plus 2013 (32-bit and 64-bit) ႏွစ္မ်ိဳးစလံုးပါရွိပါတယ္။Activator ကလည္းေကာင္းေကာင္းအလုပ္လုပ္ပါတယ္။32-bit or 64-bit တစ္မ်ိဳးထဲကို ေဒါင္းခ်င္ရင္ေတာ့ Torrent ဖိုင္ကို ေဒါင္းလုပ္လုပ္ပါ။Torrent ဖိုင္ေတြကို ေဒါင္းလုပ္လုပ္နည္း ကို လည္းေရးေပးထားပါတယ္။
Download Microsoft Office Pro Plus 2013 + Activator
Link 1 (or) Link 2 (or) Link 3
Download Microsoft Office Pro Plus 2013 + Activator (Torrent)
How To Install And Activate
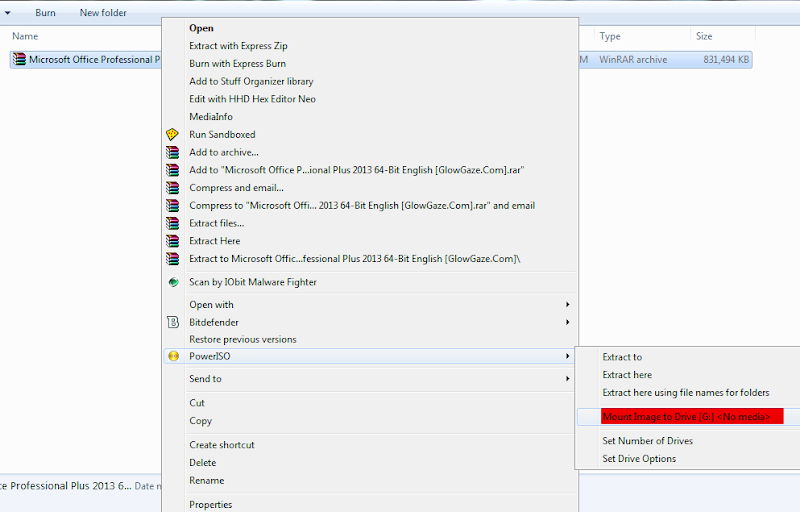
ေဒါင္းလုပ္ရရွိလာတဲ့ zip ဖိုင္ေတြကို ျဖည္လိုက္ရင္ 32-bit and 64-bit ႏွစ္မ်ိဳး အတြက္ ISO ဖိုင္ႏွစ္ခု ရရွိလာမွာပါ။ISO ဖိုင္ကို CD/DVD မွာ burn ျပီးအင္စေတာလုပ္ႏိိုင္ပါတယ္။သင့္မွာ CD/DVD အဆင္သင့္မရွိရင္ ISO ဖိုင္ကို Mount လုပ္ျပီးအင္စေတာလုပ္ႏိုင္ပါတယ္။ ISO ဖိုင္ကို Mount လုပ္ဖို ့ PowerISO ကို ေဒါင္းလုပ္လုပ္ပါ။တစ္ျခား ISO ဖိုင္ေတြကို Mount လုပ္ေပးႏုိင္တဲ့ Software ေတြကိုလည္း သံုးႏိုင္ပါတယ္။PowerISO ကို အင္စေတာလုပ္ျပီးရင္ သင္ အင္စေတာလုပ္ခ်င္တဲ့ Office Version ရဲ ့ ISO ဖိုင္ေပၚမွာ right click ႏွိပ္ျပီး Mount Image to Drive ကို ႏွိပ္ပါ။
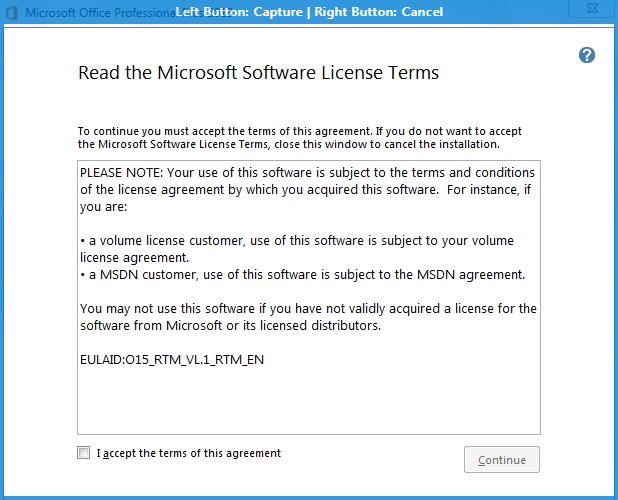
ျပီးရင္ My Computer ေအာက္ကို သြားျပီး Mount လုပ္ထားတဲ့ Drive (အေပၚကပံုမွာေတာ့ Drive G ပါ။) ထဲက Set up ဖိုင္ကို run ျပီးအင္စေတာလုပ္ႏုိင္ပါျပီ။အင္စေတာစျပီးမလုပ္ခင္ ကြန္နက္ရွင္ကို ခနပိတ္ထားပါ။Activator နဲ ့ activate လုပ္ျပီးတဲ့ အခ်ိန္ထိပိတ္ထားပါ။
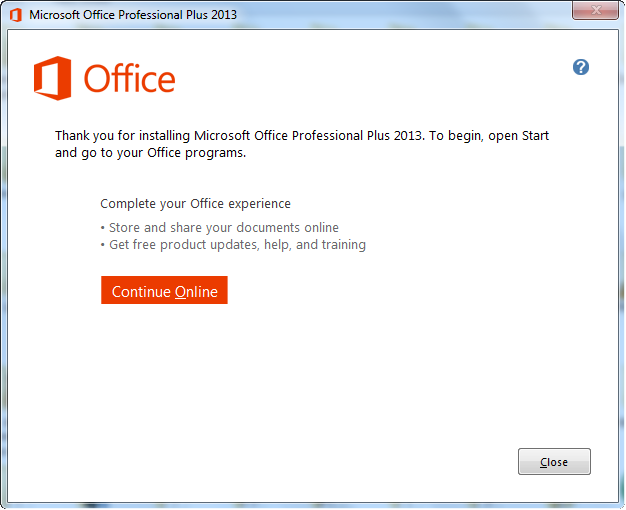
Install Wizard ေနာက္ဆံုးမွာ Close ကို ႏွိပ္ျပီး ပိတ္ပါ။
Activate လုပ္ဖို ့ Activator ကို run ပါ။ျပီးရင္ေတာ့ Microsoft Office Professional Plus 2013 ကို စသံုးႏုိင္ပါျပီ။Activate လုပ္ခိုင္းတဲ့ wizard ေတြကို သင္မျမင္ေတြ ့့ရရင္ သင့္ရဲ ့ Microsoft Office က Activated ျဖစ္ပါျပီ။
Miss Gadgets & Widgets On Windows 8? Here’s How You Can Get Them Back
Windows Gadgets ေတြကို သံုးရတာ သေဘာက်တဲ့သူေတြ အတြက္ စိတ္မေကာင္းစရာကေတာ ့ Microsoft က Windows 8 မွာ Gadgets ေတြကို ျဖဳတ္လိုက္တာပါပဲ။ဒါေပမယ့္ Third Party Software Developer ေတြရဲ ့ ေက်းဇူးေၾကာင့္ သင္ Windows 8 မွာ Gadgets ေတြကို ျပန္ျပီးအသံုးျပဳႏိုင္ပါျပီ။
8GadgetPack
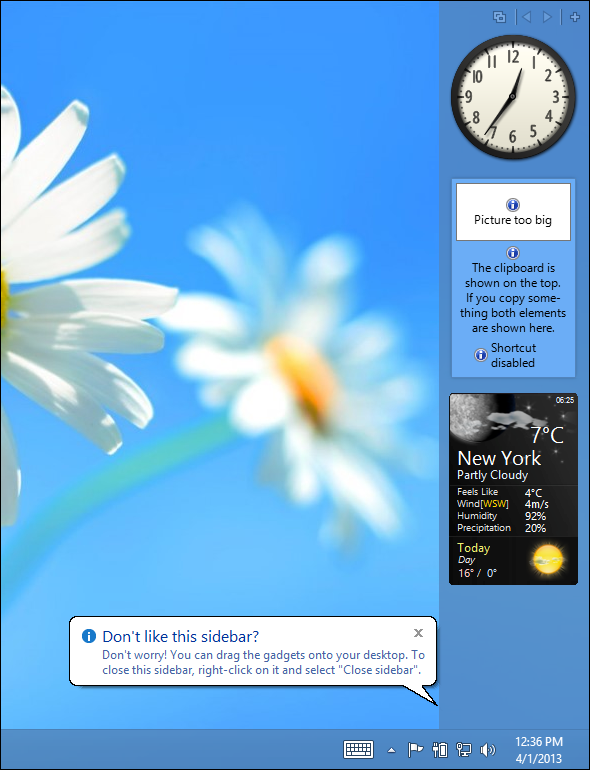
8GadgetPack ၀က္ဆိုက္ကိုသြားျပီး 8GadgetPack ကို ေဒါင္းလုပ္လုပ္ျပီးအင္စေတာလုပ္ပါ။ျပီးရင္ေတာ့ Windows 8 Desktop ရဲ ့ညာဘက္မွာ sidebar တစ္ခု ေပၚလာျပီး Gadget ေတြကို ေတြ ့ျမင္ႏိုင္ပါတယ္။Drag and Drop လုပ္ျပီး gadget ေတြကို Desktop ရဲ ့သင္ၾကိဳက္ႏွစ္သက္တဲ့ ေနရာမွာေရႊ ့ေျပာင္းထားႏိုင္ပါတယ္။Sidebar ကို ေဖ်ာက္ခ်င္ရင္ အဲဒီေပၚမွာ right click ႏွိ္ပ္ျပီး “Close sidebar” ကို ႏွိပ္ပါ။
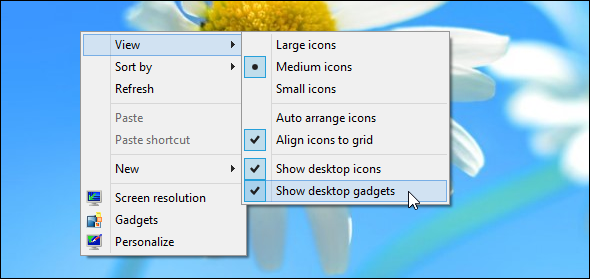
အရင္၀င္းဒိုးေတြ မွာ လို desktop ေပၚမွာ right click ႏွိပ္ရင္ Gadgets ကို ေတြ ့ျမင္ႏိုင္ျပီး View ကို ေထာက္ၾကည့္ရင္ Show desktop gadgets ကို လည္းေတြ ့ျမင္ႏိုင္ျပီးအလြယ္တကူ gadgets ေတြကုိ Show/Hide လုပ္ႏိုင္ပါတယ္။
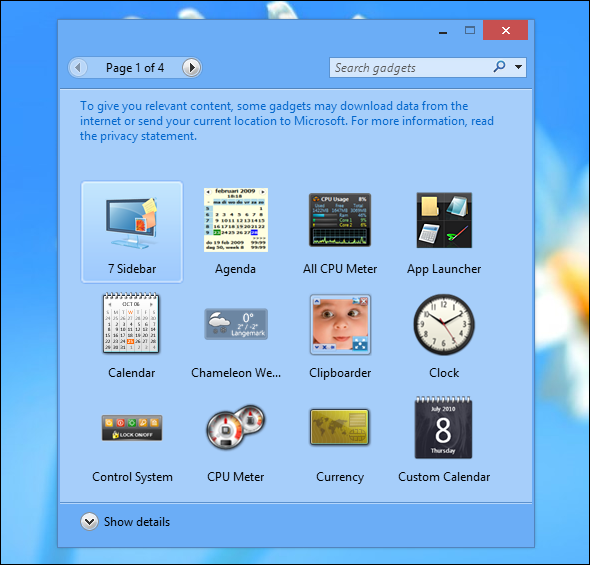
Desktop ေပၚမွာ right click ႏွိပ္ျပီး Gadgets ကို ႏွိပ္ရင္ Gadgets ေတြ ကို ေတြ ့ျမင္ႏိုင္ျပီး double click ႏွိပ္ျပီး ဒါမွမဟုတ္ drag and drop လုပ္ျပီး Desktop ေပၚမွာ ေနရာခ်ထားႏိုင္ပါတယ္။အခုဒီေဆာင္းပါးေရးတဲ့အခ်ိန္မွာေတာ့ Gadgets ေပါင္း (45) ခုရွိျပီး ေနာက္ပိုင္းမွာ Gadgets ေတြ ပိုမိုမ်ားျပားလာေအာင္ ျပဳလုပ္ေပးမယ္လို ့သိရပါတယ္။clock, weather, calendar, sticky notes, slideshow widgets,battery power, CPU usage, GPU usage, hard drive info, and processes,network monitor,rss feed စတဲ့ gadgets ေတြ ပါရွိပါတယ္။အေသးစိတ္ကို 8GadgetPack ၀က္ဆိုက္မွာ ၾကည့္ႏိုင္ပါတယ္။


